Converting Manual to Power Steering


Manual Steering to Power Steering Conversion 3500S
Method One
Unless you were given a very low mileage car by your maiden aunt, sell your manual steering car and buy a nice car with power steering.
Method Two
Oh dear still reading ? Ok then, this is not a blow by blow account of what to do, rather a few tips from someone who has done the job to point you in the right direction. If you choose to take the job on, good luck.
Please note we accept no liability.
First where to carry out the work. If you are not pushed for time and have plenty of patience I guess you could do it on a drive/ hard-
Parts Required
Most things are obvious, some not so. We cannot promise this is an exhaustive list of parts, but here goes:-
NB Part numbers refer to 3500/S workshop manual where quoted!
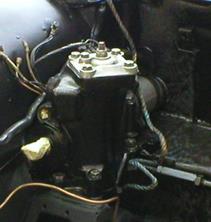
Power Steering Box ( complete ) 572714
Steering Track Rod Assembly ( complete ) 572834
Power Steering Fluid Reservoir 572846
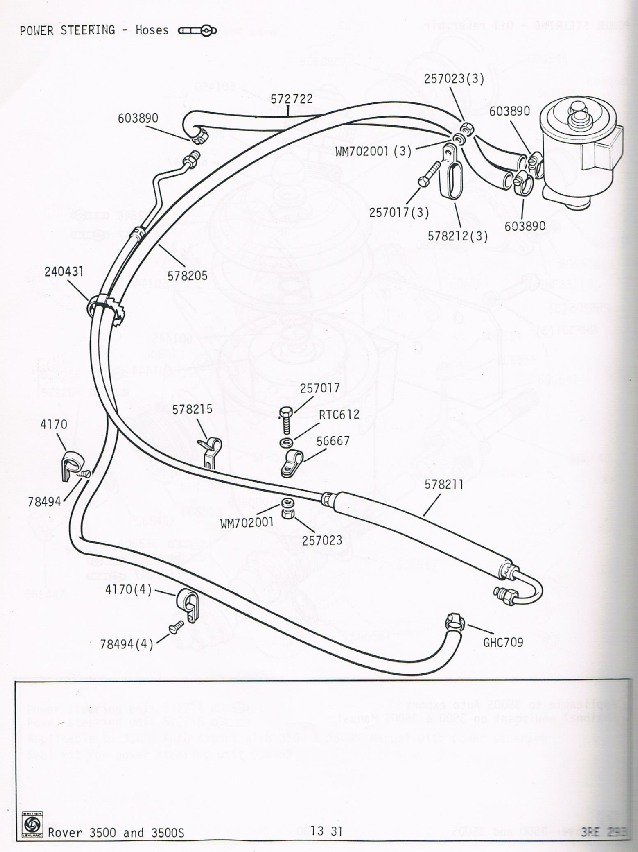
High Pressure Hose 578211
Low Pressure Hose 572722
Low Pressure Hose 578205
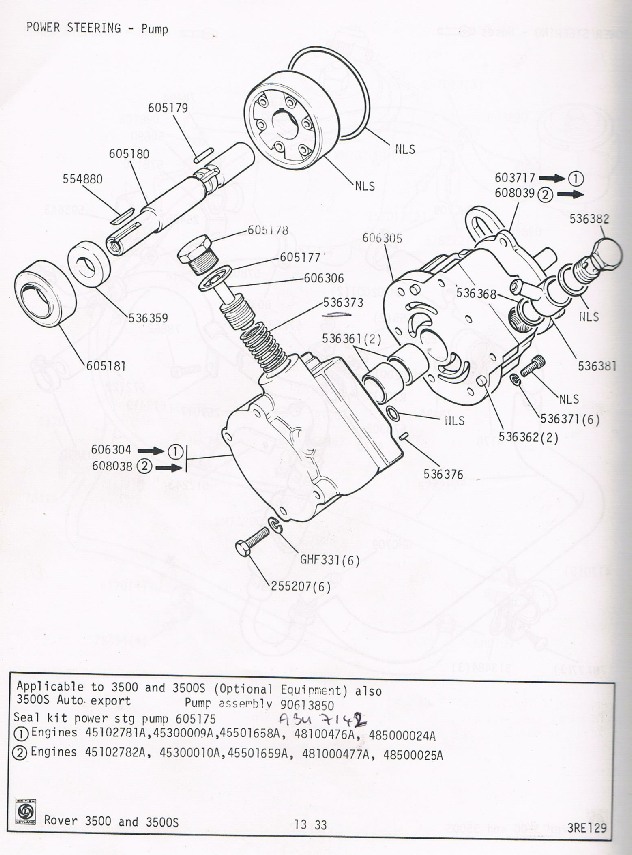
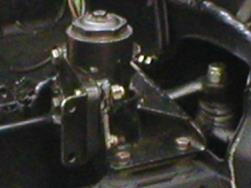
Power Steering Pump ( complete ) Page 13.33 (below)
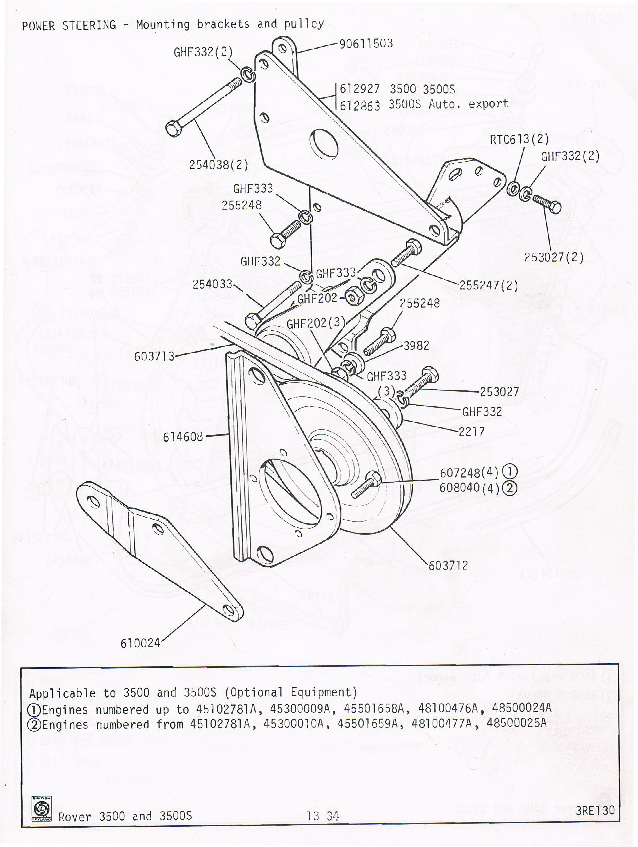
Power Steering Pump Mounting Bracket/ assembly Page 13.34 (below)
Power Steering Pump Drive Belt 603713
That is about it, it is likely that your parts will come from a donor car complete. If this is the case do not omit the last seven items, you will need these to fit the kit.
Method -
Remove all the above parts, (and anything else you take a shine to).
On your car remove:-
Steering box and track rod assembly complete. You will have fun breaking the ball joint tapers at idler and side rod assembly. You may be able to use a ball joint splitter on one, on the other use two very large hammers. If it still won't budge, torsion the top of the ball joint under load against the inner wing with a big chisel, and hit it very hard.
NB Undo the steering column pinch bolt from inside the car, (easier with the glove box removed), but leave the steering assembly in situ. Now you are ready to fit your new kit.
If you removed the steering box and track rod assembly in one, so much the better. Having removed all old bolts, studs etc from the base unit slide, scrape or shove the box and track rod into rough position. Ensure the rod is in its approximate end position. Slide the box back into the scuttle area, (yes I know it's heavy), get your friend/assistant to locate the splines on the box into the steering column pinch bolt. Ah, one easy sentence, in reality this may take some time! Now you need the most important bits. Locate the bolt holes in the steering box over the captive nuts on the base unit, loosely locate the two long studs first, these are longer than the manual steering box studs and therefore are essential, (without them your steering box will fall out). The front left hand stud as you look at it, is as per the manual gearbox part No. 256246. Locate it loosely.
Now comes the obscure bit. Slide the 3/8UNF stud diagonally down into the big hole at the front and screw it down into the captive nut, when it is home take special nut, part No. 572826 and slide it over the top of the stud and screw it down to fill the large hole around the stud, these seemingly unimportant bits and bobs are essential, the manual stud is too long to fit in the hole. Do Not! try to put the stud in first and fit the box it will not go! Reconnect the ball joints.
Good News, that's one of the worst bits over, the box is in, and once all the nuts and bolts have been tightened to the correct torque it is secure.
Now it is time to get the hydraulics working! Remove the engine bottom pulley and fit the power steering pulley. Easy huh? It is if you take the radiator out and do it from above or, take the front valence off and do it from below. Otherwise take 1 hour and lots of coffee breaks, curse scraped hands, Rover designers, poor quality sockets etc. It can be done, persevere. Here's a tip when refitting the new bottom pulley a 1inch -
Fit the Steering pump mounting bracket assembly, this involves removing all relevant bolts from the front cover, you may now have a slight water leak, this is nothing to worry about as one of the bolts goes into the water jacket. Keep the radiator cap on to reduce coolant loss. Now fit two bolts part No.253027 to the side of engine block, one is easily done, the
other requires jacking up the engine and removing the engine mount for clearance.
Do not forget to fit the pump belt to the pump before you attach the pump to bracket it will not go on afterwards. Fit the pump and adjust belt tension.
Now we're cooking with gas !!
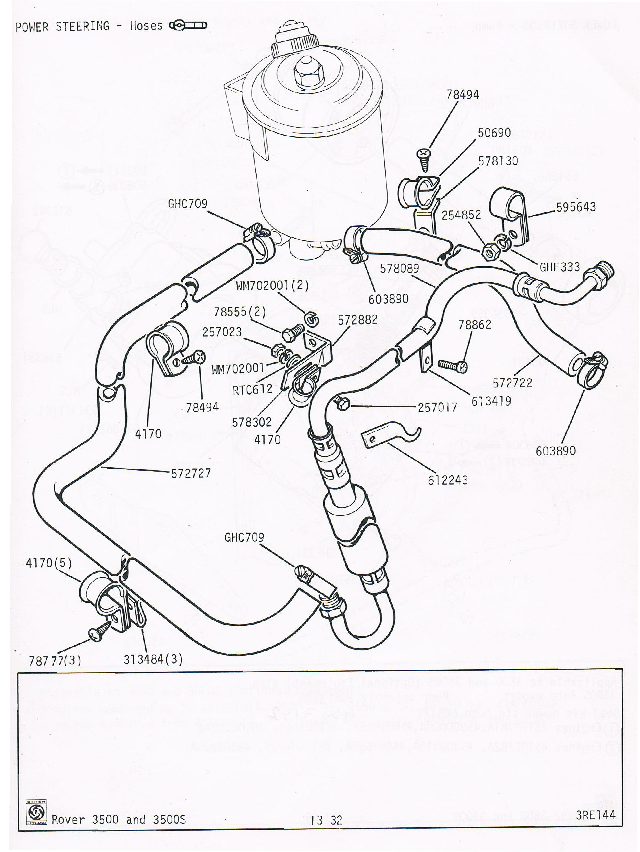
Fit the hoses to pump and box then lay them in place behind engine in front of heater to nearside inner wing. Locate and fix fluid reservoir to rear wing, it will more or less locate itself, connect hoses. Now tighten up hoses paying particular attention not to cross thread hose connections.
Nearly There...
Run through all the things you have dismantled checking bolts etc are all tightened correctly, and fill reservoir with power steering fluid. Start engine and pour fluid in as necessary and bleed the system through the bleed screw on top of power steering box. Check operation with car stationary, if everything appears satisfactory go for a very careful test
drive. Assuming everything is OK that's it. It is worth getting your car's tracking checked because of differences in the track rod.
Having done the job we would still recommend Method One. However if you insist we hope these notes are of some assistance.
|
Most important though less obvious Stud 3/8 UNF X 1.450" long 572825 Special Nut 3/8 UNF 572826 Bolts 3/8 UNF X 3 3/4" long 2 off 256250 Bolts 5/16 UNC X 7/8 long 2 off 253027 Bottom Crank Pulley 603711 |
Reproduced with kind permission of our friends and the article authors Tony & Liz Sproson
We have had many requests about converting P6’s from Manual to Power Steering and how hard or easy is it to do, so we have reproduced a quick guide here written by some friends of ours and we have added the relevant parts manual pages